Leaky Faucets: The Silent Water Wasters in Your Home

Leaky Faucets: The Silent Water Wasters in Your Home

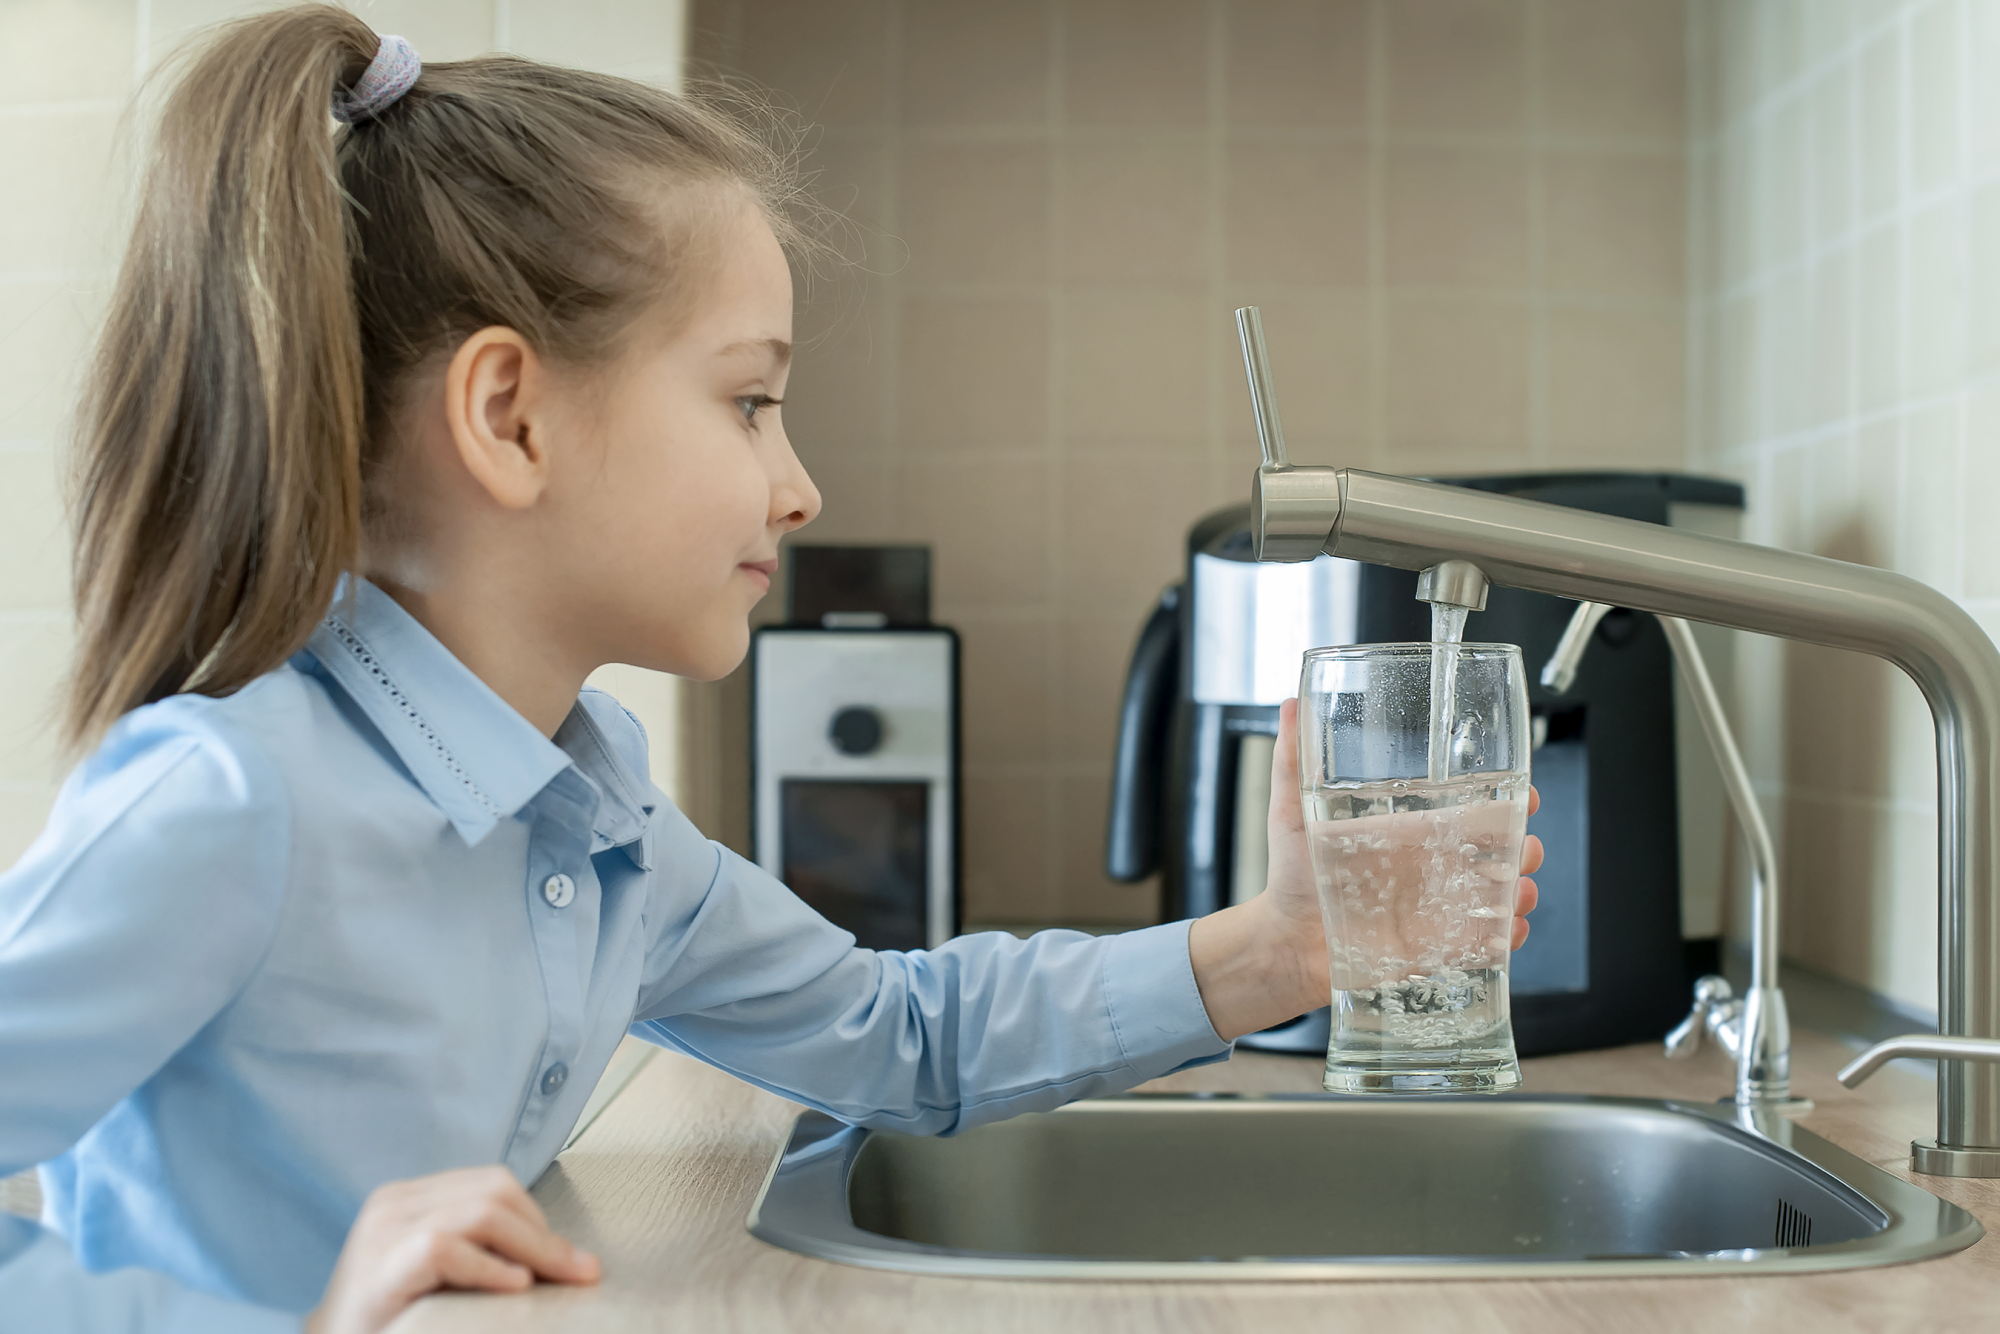
Did you know that a dripping faucet can waste up to 3,000 gallons of water per year? That’s equivalent to roughly 180 refreshing showers and a huge increase on your utility bill. Instead of having this “water waster” in your home, it’s best to get immediate dripping faucet repair before the costs add up!
 
In this post, we discuss the main culprits of a leaky faucet, how to fix it, and how to prevent precious water from dripping down the drain in the future. So, keep reading to see why you should never let a leaky tap sit for too long!

Why you should never ignore a leaky faucet

How much does a dripping faucet cost, you ask? Well, the price to pay is so much more than the sudden increase on your utility bill. Here’s why you should never dismiss those tiny drips coming from your faucet:
 
  • Increased water bill. As we’ve mentioned earlier, dripping taps can cause a huge increase in your utility bill. So, how much does a dripping faucet cost a month? Well, it can set you back by as much as $70 more per month on top of the leaky faucet repair cost.
 
  • Mold and mildew growth. Leaky faucets create a continuously damp environment, which promotes mold and mildew growth. This is dangerous to your family’s health and can be costly to clean up.
 
  • Damage to other fixtures. The continuous drip can also lead to rusting of other water fixtures in your home. The wasted water can also lead to the rotting of nearby siding and other wooden materials. 
 
  • Pest infestations. Pests like termites and rodents have one thing in common: they love constantly damp places. In that case, your leaky faucet handle might be giving them the ideal place to harbor and multiply. This spells huge trouble for you and your family.
 
  • Structural damage. Depending on where they are located, leaks from your faucet can cause water damage to walls, cabinets, and exteriors if they are not repaired immediately.

What causes a leaky faucet?

Why do faucets drip? There are many possible dripping faucet causes in your home, and here are some that you should watch out for:
 
  • Worn-out washers. Damaged or worn-out washers are the most common cause of dripping taps in homes and commercial spaces. These washers create a tight seal, but they also become brittle and damaged over time. When that happens, you’ll need replacements to prevent water from seeping through even when your taps are off.
 
  • Corroded valve seat. A leaking faucet valve can be caused by corrosion caused by sediment buildup. When this happens, the valve which connects the spout and faucet will become loose and leaky.
 
  • Damaged O-rings. O-rings are the small rubber material that seals the connection of your faucet. Like faucet washers, O-rings will deteriorate and cause leaks unless they are replaced.
 
  • Abnormally high water pressure. Too much water pressure puts unnecessary stress on your faucets, which will cause them to leak despite being in good shape. Take note that very high water pressure can also lead to burst pipes and other damage to your plumbing fixtures.
 
  • Sudden temperature changes. An abrupt shift in water temperature can loosen the components of your faucet, ultimately causing leaks. This often happens during winter or when you have a faulty water heater.
 
  • Buildup of debris. Los Angeles is known for its hard water, which can lead to sediment buildup on plumbing fixtures, including your faucets. Over time, this buildup will seep through the components of your tap, which will break its seal and cause leaks.

How to fix a faucet drip

To be fair, some cases of leaky taps can be fixed on your own if you have some handyman skills. If you want to try your hand at DIY leak repair before calling a professional, here’s what you have to do:

Step 1. Prepare the tools

First, you’ll need several tools from your toolkit. This includes an adjustable wrench, a flathead screwdriver, WD-40 oil, and replacement washers or O-rings. Take note that you may need other replacement parts later on once you’ve dismantled and inspected your faucet.

Step 2. Turn off your water supply

Next, you need to turn off your water supply to avoid making a mess inside your home. It’s best to turn off the main water line while you work on your leaky tap.

Step 3. Remove the handle

Once you’re all set, you can start removing the decorative parts of your faucet handle. You can use a flathead screwdriver to pry any of these parts. Make sure that you keep them in a container so you won’t lose them later.
 
After that, simply unscrew the mounts that attach the faucet handle to the stem. For faucets with sediment buildup, a spritz of WD-40 penetrating oil can help loosen up the screws.

Step 4. Dismantle the rest of the faucet

After removing the faucet handle, you can go ahead and dismantle the rest of the faucet. You need to use your adjustable wrench to loosen the packing nut and remove the stem. In some models, you may need to twist off the stem from the valve to loosen it.

Step 5. Inspect the components

As you remove each part, inspect it for damage. This will help you assess which parts you’ll need to buy from the hardware store later.
 
In our experience, most leaky taps in Los Angeles are due to damaged O-rings or washers. If everything in the faucet seems intact, this might also be the case for you.
 
However, if you see any broken or cracked parts, you may need to purchase a replacement. In some cases, you may need to replace the entire faucet for a long-lasting solution.

Step 6. Make the necessary replacements

Next, if you don’t see any other damage, you can replace the O-ring and washer inside the faucet. Make sure you clean the component as well to prevent sediments from damaging your replacement parts.

Step 7. Reassemble the faucet and test

Lastly, put all the components back together and test if your faucet still drips. We suggest observing your tap for a few days to see if the water leak will recur. If not, you’ve successfully finished the DIY repair. However, if the drips come back, you probably need the help of a professional.

When to call a professional plumber for a leaking faucet repair

Did your leaky faucet recur after your DIY repair? Or do the steps above sound like too much work for you? If so, you’re better off calling a licensed plumber like Pacific Plumbing Team!
 
This way, a professional can check your faucet and diagnose the root of the problem. It’s also advisable to call a licensed plumber if you have a complex or expensive faucet that could be damaged further with DIY repair.
 
Aside from the faucet itself, we will also inspect other parts of your plumbing system. This is to confirm whether high water pressure, temperature problems, and other issues are causing a fully functional faucet to leak.
 
But how much does a leaky faucet cost? It depends on the exact problem of your tap and the type of faucet you have at home. Don’t worry because we will give you a free quote before repairing your dripping faucet.
 
Overall, the cost to fix a leaky faucet is more affordable when you call a professional right away. This will save you from performing trial-and-error solutions that will cost more in the long run. Above all, you’ll save yourself from the frustration and hassle!

How to prevent dripping faucets in your home

As with any plumbing problem, leaky taps are easily preventable. Here are some of the preventive steps you can take so you no longer have to think about the cost to repair a leaky faucet over and over again:
 
  • Invest in quality water fixtures. If you’re getting a brand-new faucet, consider investing in a high-quality and durable model. While it will cost more than budget options, it will also hold better against wear and tear that causes leaks.
 
  • Keep an eye on your water pressure. We also recommend getting water pressure sensors to prevent pressure-related leaks on your faucet and other plumbing components.
 
  • Observe proper installation. There’s a reason why smart homeowners in LA call a professional plumber to install their taps. This is to ensure that they won’t encounter leaks or other similar problems. 
 
  • Clean the aerators. The mesh screens at the opening of your faucet are called aerators, which can have mineral buildup over time. Make sure you clean it regularly to avoid having water pressure issues and leaks.
 
  • Install a water softener. Hard water can corrode your faucet fast, which can lead to leaks and a slew of plumbing issues. You can prevent this by installing a water softener on your plumbing system.

Need help with your leaky taps? Call us at Pacific Plumbing Team today!

Whenever you spot leaky faucets in your home, all you have to do is call Pacific Plumbing Team for quick repairs. We provide same-day plumbing service anywhere in Los Angeles and surrounding areas, courtesy of our licensed and insured plumbers.
 
As a family-owned business, we know how important it is to have functional and leak-free faucets at home. This is why we’re quick to respond, and we don’t charge extra for overtime work.
 
So whether you have leaky taps that need fixing or some other plumbing issue, don’t hesitate to contact us right away! Our plumbers can reach you in as fast as 1 hour, depending on your exact location and our availability.
Pacific Plumbing Team Service Car with Logo & Company Name Printed
Your Partners in Plumbing Solutions

Don't let a clogged sink disrupt your daily routine. Contact Pacific Plumbing Company today for efficient and reliable solutions. Our experienced team is ready to tackle any plumbing challenge, providing prompt service and peace of mind. Let us handle the clogs so you can get back to what matters most.
Understanding Low Water Pressure and How to Fix It

Understanding Low Water Pressure and How to Fix It

Have you ever asked yourself, “Why does my sink suddenly have low water pressure”? Lack of water pressure can make your chores even more hectic. From a sluggish flow in the showerhead to weak water coming into the kitchen sink, low water pressure is an annoying reality that can be indicative of extensive plumbing issues. The good news is that it is usually easy to solve once you can find the source of the problem. In this article, we will discuss some of the most common reasons for low water pressure and solutions you can implement to fix it.

Common Causes of Low Water Pressure

Clogged Pipes

Living in areas with hard water, mineral buildup can constrict the opening of your pipes, impeding flow. Over time, this buildup acts like a dam, stopping the movement of water.
 
Just imagine trying to drink through a straw with one end pinched off…it would drive you crazy! This is the scenario playing out inside obstructed pipes. The result? Bathroom sinks and kitchen faucets have poor water pressure.

Leaks in the Plumbing System

Leaks are sneaky. Any small, unnoticeable hole can cause low water pressure in the house. If your water meter is still ticking over despite no taps running or you notice wet patches on walls and ceilings, then there may be a hidden leak.
 
Moreover, leaks are not only a waste of water but can also result in expensive damage to your property over time.

Issues with the Pressure Regulator

A pressure regulator in your home (a device that controls the water entering the pressure of a building) can be also to blame. Given enough time, these regulators can wear out or malfunction, causing the pressure to drop or soar. If you have noticed that your water pressure seems to decrease over time or varies and gets inconsistent, this is a probable culprit.

Municipal Water Supply Problems

First, the problem may not be in your house at all. A sudden drop in pressure may be due to external factors, such as maintenance work or a city-wide water problem. If your neighbors are also getting low water pressure, call the supplier of our drinking water before looking for issues in a plumbing system.

Closed or Partially Closed Valves

If the valves controlling water flow into your home aren’t fully open, you’ll experience restricted pressure. This is a common problem, especially when work has been done, and the valves might not be returned to their original positions.

How to Diagnose Low Water Pressure Issues

Check All Fixtures

Start by determining whether the low pressure is affecting only one faucet or if it affects your whole house before you dive into solutions. Run all the faucets, showers, and external taps. Is the kitchen sink running slowly, or has everything in your home affected?
 
If low water pressure in the house occurs in one spot, the issue is probably an isolated problem, such as a clogged pipe. In other cases, where multiple fixtures are affected, you may have bigger system problems to rectify.

Inspect the Pressure Regulator

Are you not sure if your pressure regulator is causing the issue? It’s simple to check. This bell-shaped device is usually installed where the main water line enters the home. Use a water pressure gauge to see if your pressure is below the recommended 40 to 60 psi. If it’s too low, the regulator might need an adjustment or replacement.

Look for Leaks

Detecting leaks isn’t always straightforward. One reliable way is to check your water meter. Turn off all water-using appliances and faucets, then see if the meter is still running. If it is, you likely have a leak somewhere. You can also inspect your home for signs of moisture, such as water stains, mold growth, or damp areas that never seem to dry out.

Practical Solutions to Increase Water Pressure

Clean or Replace Clogged Pipes

Mineral buildup inside pipes restricts water flow, leading to lower pressure. If you suspect this is the issue, cleaning or replacing the affected pipes can restore proper flow.
 
In some cases, a simple vinegar solution can help dissolve the minerals, but if the buildup is severe, you may need professional help from a plumber. Pacific Plumbing Team can assess your pipes and provide effective solutions, whether it’s cleaning out the blockage or replacing outdated plumbing.

Fix Leaks

Fixing leaks can be as simple as tightening a loose pipe joint or as complex as replacing entire sections of piping. Addressing even minor leaks can significantly improve water pressure. Plus, stopping leaks early prevents more severe water damage and higher utility bills. If you’re unsure where the leak is or how to fix it, the Pacific Plumbing Team can locate and repair leaks efficiently, ensuring your system runs smoothly again.

Adjust or Replace the Pressure Regulator

If your pressure regulator is malfunctioning, adjusting it might restore your water pressure. Most regulators have a screw you can turn to increase or decrease the pressure. Be cautious, though—adjusting it too high can damage your plumbing. 
 
If you aren’t comfortable making adjustments or if the regulator needs replacement, the Pacific Plumbing Team can step in. They have the expertise to set up your system correctly and safely.

Install a Water Pressure Booster

A water pressure booster is a pump that increases the pressure of the water coming into your home. This can be especially helpful in areas where municipal water supply pressure is consistently low. Pacific Plumbing Team can recommend and install a booster that suits your home’s needs, ensuring a consistent and steady water flow.

Check and Open Valves Fully

Sometimes, the simplest solutions are the most effective. Make sure that the valves controlling the water supply to your home are fully open. Check the main shut-off valve as well as any smaller valves near individual fixtures. You’d be surprised how often low water pressure is simply due to a valve that’s been accidentally turned partially closed.

Specific Solutions for Different Areas

How to Fix Water Pressure in the Shower

Why is my shower pressure low? Low water pressure in the shower is a common complaint. Start by cleaning or replacing the showerhead, as mineral deposits can restrict flow. If that doesn’t help, check for any kinks in the water hose, if applicable, and make sure the valves are fully open. In some cases, you might need to adjust the pressure regulator or install a water pressure booster.

How to Improve Water Pressure in the Bathroom Sink

Weak water flow in the bathroom sink might be due to clogged aerators. Unscrew the aerator, clean out any debris, and screw it back on. If that doesn’t help, check for leaks in the pipes under the sink. If you need assistance identifying the problem, the Pacific Plumbing Team can diagnose and fix the issue quickly.

How to Fix Water Pressure in the Kitchen

Similar to bathroom sinks, low water pressure in the kitchen often results from clogged aerators or minor leaks. Start by cleaning the faucet components. If the problem persists, it could be a sign of a bigger issue, such as a clogged pipe or a problem with the main water line. Pacific Plumbing Team can inspect your system and offer tailored solutions to boost kitchen water pressure.

When to Call a Professional Plumber

Sometimes, low water pressure isn’t a DIY fix. If you’ve tried all the suggestions and still have a weak flow, it’s time to call in professionals. More complex issues, like problems with the pressure regulator, significant leaks, or outdated pipes, require expert handling to avoid making matters worse.
 
Pacific Plumbing Team has the tools and experience to tackle any plumbing challenge, from diagnostics to repairs and upgrades.

Ready to Boost Your Water Pressure? Call the Pacific Plumbing Team Today!

Low water pressure can disrupt your home’s comfort and convenience, but the right diagnosis and solutions can quickly restore normalcy. Whether it’s fixing a leak, adjusting a regulator, or installing a booster, addressing these problems promptly can save you from bigger, costlier repairs down the line.
 
If you’re struggling with low water pressure and need help identifying or fixing the issue, the Pacific Plumbing Team is ready to assist. Their skilled plumbers offer comprehensive services, ensuring that every part of your plumbing system operates efficiently.
 
Reach out to Pacific Plumbing Team today and let them restore steady, strong water flow to your home. By understanding the causes and solutions of low water pressure, you can take practical steps to improve water flow throughout your home.
 
When the problem goes beyond a simple fix, you know who to call. Pacific Plumbing Team is just a call away, ready to ensure your plumbing system is in perfect shape so you can enjoy steady showers, strong faucets, and a smoothly running home.
Pacific Plumbing Team Service Car with Logo & Company Name Printed
Your Partners in Plumbing Solutions

Don't let a clogged sink disrupt your daily routine. Contact Pacific Plumbing Company today for efficient and reliable solutions. Our experienced team is ready to tackle any plumbing challenge, providing prompt service and peace of mind. Let us handle the clogs so you can get back to what matters most.

Why Is My Toilet Running? Common Toilet Plumbing Issues

Why Is My Toilet Running? Common Toilet Plumbing Issues

If you’re asking, “Why is my toilet running? or “How can I fix a running toilet?” — you’re not alone. Most homeowners will come across this problem, and the majority of the reasons are easy to fix once you understand what causes it.
 
A running toilet can waste hundreds of gallons of water a day and spike your monthly bill. It signals an issue that will only get worse if not repaired, and it can lead to more significant plumbing problems down the line.
 
In this blog, we will examine common reasons why your toilet won’t stop running and what you can do about it. We will also explain when it is wise to contact Pacific Plumbing Team professionals for help.

Common Causes of a Running Toilet

But before we get to solutions, you need to know why your toilet keeps running in the first place. A properly functioning toilet should go through the cycle of: water fills the tank, you flush your toilet, and then the water stops.
 
However, if something disrupts this cycle, water will keep flowing, either continuously or intermittently. This could mean your toilet is running randomly, or it might be running all the time. Understanding the underlying reasons is key to solving the problem and preventing it from happening again.
 
A running toilet indicates that repair is required for one or more of its internal components. Here are some of the potential causes:

1. Faulty Flapper

A flapper is a rubber seal that goes over the hole at the bottom of your toilet tank. When you flush, it raises the flapper and lets water flow into the bowl. When the flapper in a toilet tank is worn out, it may be cracked or otherwise misaligned so that water leaks from the flush tank to the bowl. That means that the toilet will run either off and on or all the time, depending upon how much of a problem it is.
 
Solution: Open the tank top and inspect your flapper. If it appears to be warped or does not fit flat in the hole, then you should consider replacing it. Thankfully, flappers are affordable and easy to replace. Turn off the water supply, drain your tank, and replace the old flapper with a new one. You should find another flapper in maximum at most hardware stores.

2. Issues with the Fill Valve

The fill valve allows water in the tank to refill every time you flush. But if it is not set properly or damaged, it creates running water in the toilet. You may also discover that you need to jiggle the handle several times for your toilet bowl to fill, or it could continuously make running water sounds despite a full tank. If all this is happening to you, it’s likely the fill valve.
 
Solution: Try lifting the tank lid and checking out how your fill valve performs. If water continues to run even after the float has reached its proper level, you may need to adjust the valve or replace it. Try first to lower the float which will help you reduce water in your tank. If this doesn’t seem to be the source of your problems, a new fill valve should do it.
 
Tip: While not the hardest DIY in terms of plumbing, this one can be tricky if you are not used to DIY plumbing. Pacific Plumbing Team can take care of this job in no time and save you the headache.

3. Flapper Chain Problems

The chain that is attached to the flapper assembly helps in letting the necessary amount of water flow during an active flush cycle. If the chain is too short, the flapper does not sit completely close, causing water to continue running. Conversely, if your chain is too long, it can either tangle or slip beneath the flapper because of its length, leading to intermittent running.
 
Solution: Take a look at the chain. It needs to be loose enough for the flapper to seal properly but not so loose that it gets snagged on something. The easy thing to do is shorten your chain by a couple of links.

4. Leaky Float

The float controls the tank’s water level. If it’s set too high, water will keep flowing into the overflow tube, which can cause your toilet to run constantly. If it’s set too low, the tank might not fill completely, leading to weak flushes. 
 
Sometimes, the float itself can become waterlogged, which prevents it from rising properly and shutting off the water.
 
Solution: Check the float’s position and adjust it if needed. Most floats can be adjusted by bending the rod or using a screw to change the height. If the float is damaged, it may need to be replaced.

5. Sediment in the Tank

If your toilet runs randomly or seems to have a mind of its own, sediment buildup could be the culprit. Over time, minerals from the water can accumulate inside the tank, affecting how the components function. This buildup can interfere with the flapper, fill valve, and other parts, leading to intermittent running.
 
Solution: To clean the tank, turn off the water supply and flush the toilet to drain it. Use a sponge or cloth to wipe away any sediment, and scrub around the flapper, fill valve, and float to make sure everything moves freely. If you live in an area with hard water, consider using a water softener to reduce future sediment buildup.
 
Tip: Not sure where to start? Pacific Plumbing Team can clean your toilet tank and check for other potential issues during a routine maintenance visit.

How to Fix a Running Toilet: A Step-by-Step Guide

Considering all of these causes, let’s discuss how you might be able to repair your running toilet.

Step 1: Check the Flapper

Open up the tank lid and check to make sure that it is closing normally. If it’s old, replace it. Typically, this is the easiest and fastest way to resolve it.

Step 2: Adjust or Replace the Fill Valve

Watch to see how the fill valve works when you flush. If necessary, adjust the float or replace it if it’s damaged.

Step 3: Fix the Flapper Chain

Verify the correct amount of slack in the chain. It needs to be loose enough that the flapper closes it but not so long as it gets tangled.

Step 4: Adjust the Float

See if the float is in the proper place and adjust it so that your water level matches what it should be. Adjusting the float will help prevent a constantly running toilet.

Step 5: Clean the Tank

Clean out any residue that may affect the internal parts. Cleaning your toilet could help keep it running smoothly

When to Call a Professional Plumber

Even though many toilet issues can be fixed with a little bit of troubleshooting, as we have mentioned, other scenarios require the help of a plumber. If you have tried all of this and your toilet continues to run nonstop, then call a plumber. Failure to address persistent issues will only result in higher water costs, wasted gallons of water, and a need for more extensive plumbing repairs.
 
Here are signs that indicate you should call a professional:
 
  • Persistent Leaks: If you have already replaced a number of parts and that has not solved the problem, then this probably indicates a deeper issue.
 
  • Broken Components: From cracked tanks and worn-out parts to damaged seals, it can be challenging to fix without the proper tools.
 
  • Complex Issues: Some problems like poor installation or internal damages are difficult to diagnose except by a professional.
 
  • Uncertain Repairs: If you are not sure which way to proceed or the repair steps seem too ambitious, attempts at DIY repairs may do more damage than good.

Why Choose Pacific Plumbing Team?

  • Experienced Professionals: Our team has years of experience handling a wide range of plumbing issues, including running toilets.
 
  • Quick Diagnosis: We can identify and fix problems efficiently, from faulty flappers to tricky fill valves.
 
  • Effective Solutions: Whether it’s a simple adjustment or a deeper plumbing issue, we have the tools and expertise to get your toilet back to normal.
 
  • Peace of Mind: Rest easy knowing your plumbing is in capable hands and your toilet will be functioning smoothly in no time.
 
If your toilet is still running, don’t let the problem worsen. Contact the Pacific Plumbing Team today, and let us restore your toilet’s efficiency.

Restore Your Toilet’s Efficiency with the Pacific Plumbing Team!

A running toilet is more than just an annoyance—it’s a waste of water and money. By understanding the common causes, you can fix minor issues yourself or know when it’s time to call for help. Whether your toilet is constantly running or runs randomly throughout the day, addressing the problem promptly can save you from bigger headaches down the road.
 
If you’re still struggling with a toilet that won’t stop running, don’t hesitate to contact the Pacific Plumbing Team. We’re ready to help with everything from simple repairs to complex plumbing issues, ensuring your toilet flushes perfectly and efficiently. 
 
So next time you ask yourself, “Why does my toilet run randomly?”—remember that there’s a solution, and it’s just a phone call away. Call us today to say goodbye to all of your emergency plumbing problems.
Pacific Plumbing Team Service Car with Logo & Company Name Printed
Your Partners in Plumbing Solutions

Don't let a clogged sink disrupt your daily routine. Contact Pacific Plumbing Company today for efficient and reliable solutions. Our experienced team is ready to tackle any plumbing challenge, providing prompt service and peace of mind. Let us handle the clogs so you can get back to what matters most.

Why You Should Never Ignore Strange Noises in Your Plumbing

Why You Should Never Ignore Strange Noises in Your Plumbing

Here’s one thing you should know as a homeowner: good plumbing should be quiet – especially when not in use. So, if you start hearing any gurgling, banging, ticking, or other strange sounds, it’s time to call a plumber to get the plumbing noises checked.
 
Be it noisy pipes in the bathroom, groaning pipes when water is turned on, or running water sounds on your walls, you should consider it as your plumbing system’s ‘cry for help’. And the best person to call for ‘rescue’ is a licensed plumber in your area.
 
In this post, we’ll discuss why you should never ignore strange plumbing noises and who you can call for quick repairs. Read on and check if you’re hearing any of it in your own home!

Don’t ignore these plumbing noises!

If you’re hearing these funny noises near or around your plumbing, we suggest calling a plumber like PPT:

1.  Hissing sounds

Is there a hissing noise from your water heater? Or can you hear a hissing sound from any of your water fixtures? This is a tell-tale sign that the water pressure is too high. If not addressed right away, it can cause the pipes or fixture to burst, which is a lot of mess to clean up and an expensive plumbing repair to pay.
 
Take note that the hissing sounds can also occur on your toilet. Knowing how to stop a toilet from hissing needs a different solution since it’s caused by a different problem. There’s a high chance that the toilet chain is too long or too short, causing the water to leak and hiss from the tank.
 
Very important: If the hissing sound is coming from your gas line or gas appliances, call our plumber right away! This is a sign of a gas leak, which will be dangerous if not fixed immediately.

2.  Squealing noises

“Why does my shower make a squealing noise?” Well, it sounds like sediments are clogging the holes of your showerhead. This is a typical problem, especially for areas with hard water, like Los Angeles, California.
 
For this, you can try removing the showerhead and giving it a nice scrub. If that doesn’t fix the shower noises, it’s best to call a professional plumber.

3.  Running water sound

Many customers call us asking, “Why do I hear water running in my house even when the taps are off?”. If you have the same issue, that means you need water leak detection as soon as possible. It’s important to act fast in this case because water leaks can cause bigger and more expensive damages by the hour.
 
But is it normal to hear water running through pipes? As long as the pipes are not shaking or banging vigorously, this is completely normal.
 
How about clicking on the wall when the water is running? This could be caused by pipes not being secured enough, causing them to jolt or click when water runs through them. But to be sure, we suggest you call us for a thorough inspection.

4.  Banging noises

Are pipes making noise in your wall? Or is your garbage disposal making a funny noise like something’s stuck? It’s possible that there’s a blockage that needs to be removed.
 
When it comes to banging pipes, it’s possible that loose plumbing components are floating and hitting metal or plastic. For garbage disposal, foreign objects might clatter when you turn the unit on. Whatever it is, calling a plumbing professional like the Pacific Plumbing Team will fix the problem quickly.

5.  Gurgling sounds

A gurgling air noise from the sink or any drain in your home could indicate a clogged drain line. The blockage causes trapped air and water to produce a loud sound as they try to escape the pipes. Over time, the clogging will get worse until you get very slow drains or even backups.
How about a faucet that makes a loud noise when turned on? It’s a classic example of a ‘water hammer’, which needs professional repairs just the same.

What happens when you ignore strange plumbing noises

While some plumbing sounds are completely normal, you shouldn’t dismiss loud and strange ones. Here’s why you should call a plumber right away:

1.  Leak-related sounds can result in water damage.

Do you hear a dripping sound in the wall but no water? Take note that leaks can be so hidden that you won’t see water damage until it’s already extensive. So, if you hear any slushing or faucet running sound coming from your wall, you should call a plumber to get it checked.
 
At Pacific Plumbing Team, we use advanced moisture meters and infrared cameras to spot leaks behind your walls without having to cut them open. This way, you won’t have to deal with unnecessary repairs if you don’t have a leak.

2.  The rattling and shaking will damage your pipes.

Sound is all about vibrations, and those vibrations and banging can compound the damage to your pipes over time. In the plumbing world, this is called a ‘water hammer’, which requires the installation of a hammer arrestor before it damages other components.
It’s very important to have these strange noises checked immediately before the situation worsens. This is especially crucial during winter when pipes are at the highest risk of bursting due to the sudden shift in temperature.

3.  Gurgling noises due to blockage can cause messy backups.

Plumbing noises caused by blockages or sludge buildup can become a much bigger problem if not addressed. Over time, the blockage will thicken and prevent water from flowing properly.
 
This translates to messy backups in your drains, which are not only nasty but also a risk for water damage. This can happen in your sink drain, shower drain, and even toilet itself.

4.  Leak-related plumbing noises will increase your water bill.

A faint, trickling water faucet sound may not seem like a huge problem until your utility bills arrive.
 
According to the Environmental Protection Agency (EPA), about 3,000 gallons of water are lost to leaky faucets. This is at a drip rate of one drip per second, which is equivalent to 180 showers. And for your water bill, that could amount to an additional $720 or more a year!

5.  Noises due to high water pressure can cause burst pipes.

Burst pipes are one of the most common problems we fix in Los Angeles. In many cases, there are warning signs that homeowners ignore, which include banging and rattling sounds on their pipes.
 
So, before this happens, you should call a local plumber like us to fix the issue immediately. This way, you can save on repairs, which include additional dollars spent on water damage remediation.

6.  Loud bangs due to an ‘airlock’ will disrupt water pressure.

Airlocks are pockets of air that get trapped within your plumbing system, especially the pipes. They’re often caused by water hammer, incomplete drainage, and improper installation. These can also be the culprits for why your shower pipes are making noise for no reason.
 
Unfortunately, air locks can also disrupt water pressure, in addition to the gurgling and sputtering noises they create. In some cases, customers call us because there’s too much air in their pipes, and the water flow has completely stopped.

7.  Any strange noises from your water heater can lead to failure.

One of the most common calls we get are water heater-related, including lack of heat, no water flow, pilot light issues, and strange sounds.
 
When it comes to water heater noises, you’d want to call a plumber right away, as they can easily lead to a potential failure. Most water heater noises are associated with sediment buildup, worn-out parts, pressure issues, and overheating—all of which can leave you cold if you ignore them.

8.  Plumbing noises will sabotage your home selling

If you’re putting your property on the market, it’s important to clear up any plumbing issues first. This way, potential buyers won’t be turned off or use it as a way to haggle the initial asking price.
 
Be it your bathroom pipes making noise or other parts of your plumbing, it’s best to call our plumbers to fix everything for you. This way, your home will be ready for open houses and showings, even for the most meticulous buyers.
 
Take note that plumbing is a huge factor for homebuyers when making a purchasing decision. You wouldn’t want noisy pipes and drains to cost you a profitable sale!

Call Pacific Plumbing Team to get to the root of the problem!

If there are strange noises coming from your plumbing system, all you have to do is call us at Pacific Plumbing Team. We will send our emergency plumber to your place in as fast as 1 hour, depending on your location and our availability.
 
We provide full-service home and commercial plumbing in Los Angeles and surrounding areas. Our licensed and insured plumbers are available for same-day repairs, so your plumbing issues won’t have to wait for a solution.
 
Be it strange noises or other plumbing problems, call Pacific Plumbing Team, and we’ll flush them all down the drain. We don’t charge extra on overtime, and rest assured that we have the price and quality to beat in all of LA!
Pacific Plumbing Team Service Car with Logo & Company Name Printed
Your Partners in Plumbing Solutions

Don't let a clogged sink disrupt your daily routine. Contact Pacific Plumbing Company today for efficient and reliable solutions. Our experienced team is ready to tackle any plumbing challenge, providing prompt service and peace of mind. Let us handle the clogs so you can get back to what matters most.

Why You Should Call a Plumber for Low Water Pressure Issues

Why You Should Call a Plumber for Low Water Pressure Issues in Your Bathroom

Many different factors can cause low water pressure in your home, from the water valve to the possibly low supply of your water district. Finding the cause of the problem can take a lot of time, so the best single solution is to call the plumber.

Imagine yourself having a nice, peaceful breakfast at the table. When suddenly, your kid, all soapy and wet, from the second-floor bathroom yells, “There’s no water!!!”

Such panic can disrupt a supposed peaceful morning before going to work or school—all because the shower isn’t working as it should. The cause? The water pressure is low upstairs.

We’ll help you avoid this kind of situation. In this blog, we will talk about low water pressure in your home. We will cover the main reasons for this problem and how to fix it.

Identifying Your Water Problem

Plumber for Low Water Pressure Issues

Low water pressure is a common home plumbing issue. It affects not only showerheads, as in the scenario we mentioned, but also faucets, dishwashers, toilets, and other plumbing fixtures.

How can you be certain it’s related to the water pressure?

Well, it’s fairly simple. You live in your house, and you pretty much know the “normal” pressure of your water. Which should be anywhere from 40 to 46 PSI (pounds per square inch). So if that becomes disrupted, suddenly becomes low, or you experience no water at all, then that’s the problem right there.

Why You Should Call a Plumber to Solve Your Low Water Pressure at Home

Calling the experts in plumbing can bring you a great deal of benefits. When you have them solve your low water pressure issue at home, you somehow get relieved of the stress these plumbing issues cause you and your family.

Ensure Constant Water Pressure Levels

No matter what the cause is, your plumber is there to help you get consistent water pressure across all the floors in your home. Hiring a plumber ensures you get steady water pressure right when you need it.

Avoid More Serious Plumbing Issues

Hiring a plumber allows your water system to be checked thoroughly. Technical causes that affect your water pressure, such as leaks and pipe problems, will also be solved. Talk about hitting two birds with one stone, right?

Convenience

Our team of experts makes sure that you experience comfort and convenience while we take care of the issue. From finding the root cause to implementing the solution – all you have to do is sit back and relax while we get this all sorted out.

Peace of Mind

They say money can’t buy peace of mind. We say, nope! It definitely can! Especially when you use your money to hire an expert to solve your plumbing dilemma. When home issues like plumbing problems like this are solved, you sleep better at night knowing the problem is done.

Non-Technical Causes of Low Water Pressure

If you’re experiencing sudden low pressure in your home, you may be surprised that it can be due to a couple of simple causes that don’t really require fixing.

However, it can be frustrating, especially if you’re in the middle of a shower like the kid in our example above. And we totally understand why!

Too Many People Using Water Appliances

If you notice water pressure is not consistent if family members inside your home are using water appliances simultaneously, it means the pressure cannot keep up with the demand.

This typically happens on specific occasions when your family uses a combination of plumbing fixtures, like when your wife is using the sink while the children upstairs are each on their bath routine in the morning.

A few adjustments, like taking turns, can be made so that this won’t be a constant issue, especially when the water pressure seems fine throughout the day and night.

Water Supply is Low

If the problem is not inside your home, then it’s probably your neighbors. They might be using water in high demand, and the supply for other houses may become limited. It can be annoying to experience this loss or slow down in the water supply, and you can definitely blame your neighbors for that.

Unfortunately, it is not their fault. Your water supply district might not have informed you of a possible water supply change. This only happens when your municipal water supply district is fixing something in its chain. Or the water supply isn’t just enough to cater to everyone adequately.

Natural water resources are piped and directed to treatment facilities that serve your area. The water is then transferred to pressure tanks that provide water in your neighborhood. So, if the demand becomes too high, your provider might not be able to keep up.

Main Reasons for Low Water Pressure

After checking the water supply and your family’s usage – you realize the problem isn’t there. There’s a change in water pressure in the house. So where could the problem be?

Let’s move on to the main reasons you’re experiencing this low-pressure problem and where to look them:

Partially Closed Main Valve

If you’re wondering how you can increase water pressure in the apartment, checking the main valve can help. The main valve is found on the main waterline immediately after the waterline enters the home. It’s responsible for controlling the water flow inside your house. If it is partially closed, the water pressure is reduced, which can possibly cause the issues you’re experiencing that affect the whole house.

There are different types of main water valves. One is a lever that moves 90 degrees, and another is a gate valve with a rotating handle. If you want to open the valve completely, just rotate it counterclockwise until it can no longer turn, then turn it back a little bit to avoid possible leaks.

Partially Closed Individual Valves

Just like the main valve, when individual valves in your bathroom or kitchen, which are located beneath the sink cabinet, are partially closed, the water pressure becomes affected. Fixing water pressure in the shower can be as easy as opening its designated valve.

This occurs when the water is briefly closed and is not turned back all the way. The quick fix is just to rotate the handle counterclockwise to open the valve and turn it back a quarter fully so there won’t be a leak.

Partially Closed Water Meter Valve

Apart from the first two valves we discussed, there’s another valve you can check. This one is located in your water meter—the one that the local utility company uses to measure your water consumption. The valve is usually outside your home. If this valve is partially closed, then it’s the reason the water flow is restricted.

Pressure Regulator Failure

Both high and low pressure are not good—it should be just enough to adequately accommodate your home’s water demand. Too high water pressure can damage fixtures like showerheads, faucets, appliances, and water lines, while too little pressure can become a headache for the user.

How to repair low water pressure, then? Check your water pressure regulator if it has been set correctly. You can adjust this on your own or call a plumber to do the job.

If you find the regular on the correct setting, it could indicate a failure, and you might need a replacement. In this case, we recommend contacting a reliable plumbing company, like Pacific Plumbing Team.

Plumbing Leaks

Leaks are, of course, almost always inevitable—especially in areas you don’t see often. One issue they can lead to is low water pressure in your home as the water gets redirected out of the pipe.

This leak can be huge, especially if it’s affecting large areas of your home. If you need an emergency plumber, don’t hesitate to call us! We offer same-day service to fix your leaks on the spot.

Problems within Your Pipes

Corroded or clogged pipes can also cause the low water pressure you’re experiencing. Rust and limescale buildup are two enemies of your plumbing pipes that cause many plumbing issues. 

Galvanized steel pipes last around for 20 years. Copper pipes can go as long as 50 years. And the brass ones, up to a whopping 70 years. But no matter how old these pipes can last, they should be replaced at the end of their life.

If you live in an area with hard water, mineral buildup is likely, and thus, pipes can have a shorter lifespan. You need a professional plumber to inspect the condition of your pipes, especially when you need to replace them.

Clogged Aerators

A common issue of too low pressure of water in specific plumbing fixtures is having a clogged aerator. Aerators are the small attachments you can find in faucets, bidets, and showerheads.

Its function is to mainly regulate the flow of the water that comes out so it doesn’t splash when you use it. Oftentimes, mineral deposits and debris can clog the aerator, thus affecting the pressure of the water that comes out of it. So, how do you fix the poor water pressure? Cleaning or replacing aerators in your fixtures should solve the problem.

Small Branch Lines

Another cause of low water pressure is having small branch lines. This can significantly impact the water distribution to various fixtures in your home.

During periods of high water demand, small branch lines struggle to accommodate the required flow throughout the home. Upgrading these branch lines into bigger-diameter pipes can alleviate the problem and restore normal water flow pressure.

How to Deal with Low Water Pressure?

Dealing with water pressure issues at home involves identifying the problem that causes it at first. Second, we need to take action and solve the problem.

If you find yourself asking this, “My water pressure at home is low, what do I do?” We suggest checking all the possible reasons we listed above and listing down what you observe in each one.

Once you know the problem and the cause for it, move to coming up with a solution. If the problem is just a partially closed valve, it would be easy to just open it. But if the problem is more complex like pipe leaks and small branch pipes, we recommend calling the experts in plumbing.

Let Pacific Plumbing Team fix your water pressure problems!

Before searching for plumbers, remember that not every business offers the same services and the same level of expertise.

Our team of certified plumbing experts specializes in full-service plumbing, emergency repairs, and complex plumbing situations that need immediate solutions. With over 8,000+ happy customers across Los Angeles and nearby areas, we’re happy to add you to the count!

Give us a call for an upfront quote with no overtime charges!

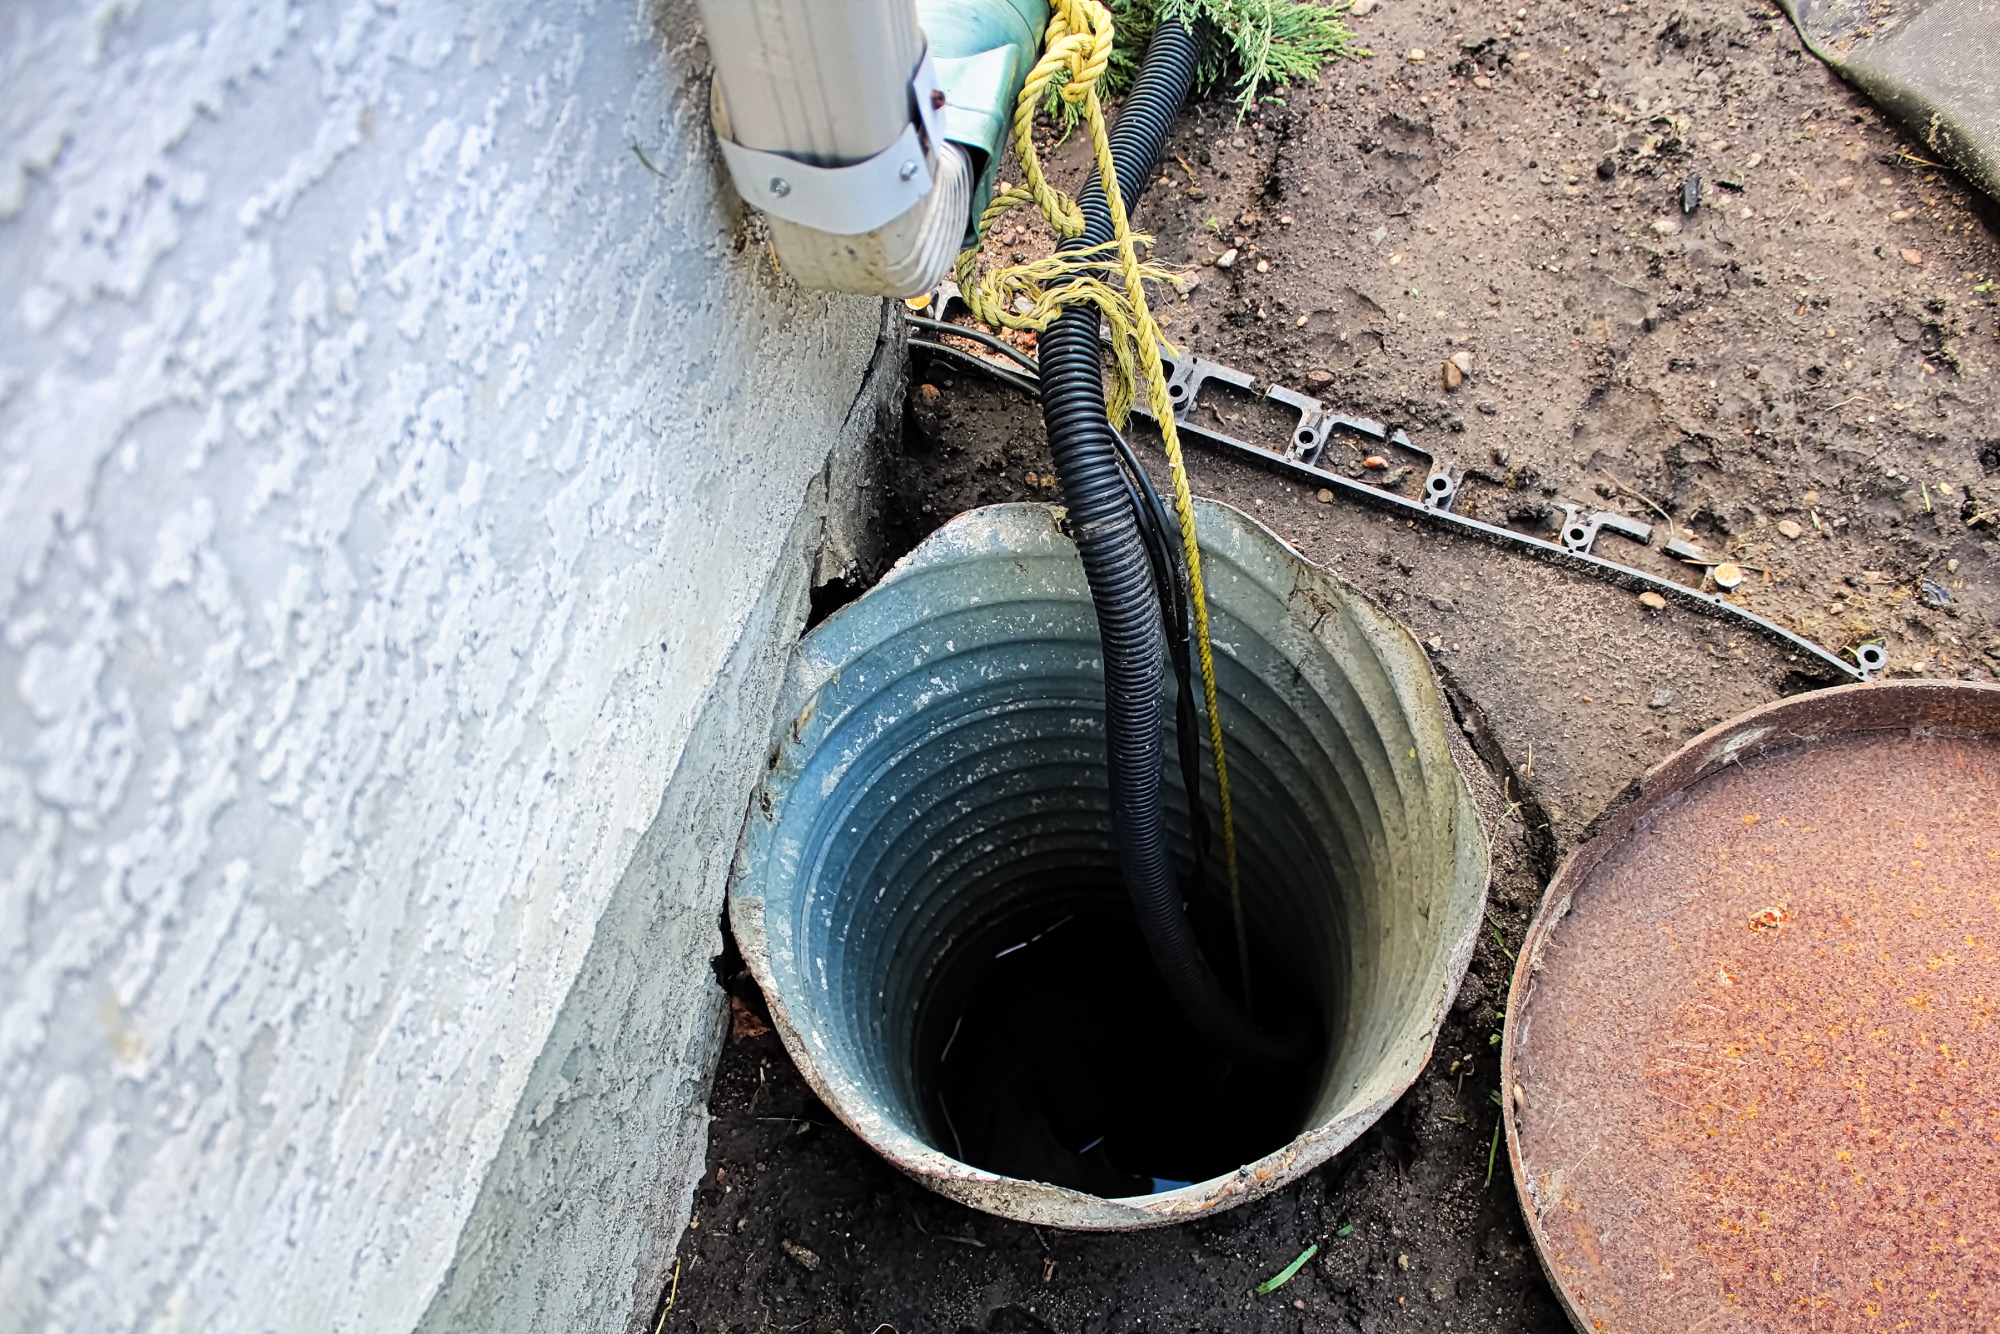
How to Maintain a Sump Pump to Prevent Flooding

How to Maintain a Sump Pump to Prevent Flooding

A sump pump is your home’s first line of defense against flooding and water damage in your basement or crawl space. This crucial device helps remove excess water during heavy rains, snowmelt, or when groundwater levels rise. However, like any mechanical device, your sump pump requires regular maintenance to ensure it works efficiently when you need it most. A malfunctioning or neglected sump pump can lead to flooding, which can cause costly damage to your home. In this guide, we’ll discuss how to maintain your sump pump to prevent flooding and keep your home safe. Following sump pump maintenance tips is essential to safeguard your basement and avoid expensive repairs.

What is a Sump Pump?

A sump pump is a crucial component of a home’s plumbing system that removes water from the lowest part of the home, typically in a pit or well below the basement or crawlspace floor. Sump pumps are highly recommended in areas with heavy flooding. There are two main types of sump pumps: pedestal and submersible. Pedestal sump pumps sit outside the pit, making them easier to service but also more visible. Submersible pumps, on the other hand, are designed to operate underwater within the sump pit, making them quieter and less obtrusive. Proper maintenance can help a sump pump last well beyond its average 10-year lifespan, ensuring your home remains protected from water damage.

1. Test the Sump Pump Regularly

One of the easiest and most important maintenance tasks is regularly testing your sump pump to ensure it’s functioning properly. A sump pump that doesn’t work when needed could lead to significant water damage during a heavy storm.

  • How to Test It: Pour a bucket of water into the sump pit to raise the water level. The pump should activate when the water reaches a certain level, draining the water from the pit. If the pump doesn’t turn on, it may need repairs or replacement.
  • Check the Float Switch: The float switch is responsible for turning the pump on and off. Ensure it’s moving freely and isn’t stuck. If the float switch isn’t working, the pump won’t activate even if the pit fills with water.

There are two main types of sump pumps: pedestal and submersible. A pedestal sump pump is characterized by its motor being situated above the sump pit, as opposed to a submersible pump, which operates underwater. Understanding the functionalities and specific needs of a new sump pump is crucial. Homeowners should keep installation instructions handy for reference.

2. Inspect the Power Source

Your sump pump is only as reliable as its power source. Since sump pumps run on electricity, it’s essential to ensure that they are properly connected to a power source and have a backup plan in case of power outages.

  • Check the Power Cord: Ensure that the sump pump’s power cord is plugged into a dedicated outlet. Check for any frayed or damaged cords, which could lead to electrical issues.
  • Install a Battery Backup: Power outages often happen during severe storms—the exact time you need your sump pump the most. A battery backup system ensures your sump pump will continue to operate even if the power goes out. Consider installing a backup system if your sump pump doesn’t already have one. Having a backup sump pump, especially in areas prone to severe weather, provides peace of mind by ensuring continued operation during power outages.

3. Clean the Sump Pit Regularly

Over time, dirt, debris, and sediment can accumulate in the sump pit, which can clog the pump and reduce its efficiency. A clogged sump pump may struggle to remove water, increasing the risk of flooding.

  • How to Clean the Pit: Disconnect the sump pump from its power source and remove any debris from the sump pit. Use a shop vac to remove dirt and sludge from the bottom of the pit. It’s important to keep the pit as clean as possible to ensure the pump can operate without obstructions. During annual checks and cleaning procedures, pay special attention to the sump basin, as it plays a crucial role in ensuring the proper functioning of the sump pump and the removal of accumulated water.

4. Clean the Pump’s Inlet Screen

The inlet screen, located on the pump itself, filters out debris before water enters the pump. Over time, the screen can become clogged with dirt, leaves, and other debris, reducing water flow and the pump’s efficiency.

  • How to Clean the Screen: Disconnect the sump pump and remove it from the pit. Clean the inlet screen using a soft brush or cloth to remove any dirt or debris. Ensure that the screen is free of blockages before reinstalling the pump. Regular sump pump maintenance, including cleaning the inlet screen, is essential to prevent basement flooding and costly water damage.

5. Check the Discharge Pipe

The discharge pipe carries water away from your home after the sump pump removes it from the pit. It’s important to ensure the discharge pipe is free of obstructions and directs water a safe distance away from your home’s foundation.

  • Inspect for Blockages: Check the discharge pipe for any blockages caused by debris, dirt, or ice. In colder months, frozen discharge pipes can prevent water from being removed, leading to backups in the sump pit. Additionally, regularly inspect the sump pump’s discharge line to ensure it effectively diverts water away from the home.
  • Ensure Proper Drainage: Make sure the discharge pipe is long enough to direct water at least 10-20 feet away from your home’s foundation. If water is discharged too close to your home, it can seep back into the basement or crawl space, causing further flooding issues.

6. Ensure the Pump is Positioned Correctly

The sump pump needs to sit flat on the bottom of the sump pit to function properly. If the pump is tilted or leaning, it can prevent the float switch from activating or cause the pump to work inefficiently.

  • How to Check Positioning: After cleaning the sump pit, ensure the pump is sitting level at the bottom of the pit. If the pump is tilted, adjust its position so it sits flat and can operate without obstruction.

7. Test the Check Valve

The check valve is an essential component of your sump pump system that prevents water from flowing back into the pit after it has been pumped out. A malfunctioning or missing check valve can lead to water constantly cycling back into the pit, overworking the pump.

  • How to Check It: Make sure the check valve is installed on the discharge pipe and is functioning properly. If water is flowing back into the pit after the pump shuts off, the check valve may be faulty or installed incorrectly. Replace or adjust the check valve if necessary.

8. Safety Precautions and Troubleshooting

Safety First

Sump pumps operate using electricity and are in and near water, creating a potential hazard situation. To stay safe while performing maintenance, follow a step-by-step process. Safety procedures should be implemented before starting maintenance work. Ensure power is disconnected and the pump is unplugged before performing any maintenance tasks. Wear protective gear, such as gloves and safety glasses, to prevent injury.

Common Issues and Troubleshooting

Common issues with sump pumps include a pump that won’t turn on, turns on but doesn’t eject water, or runs continuously. Each scenario requires a different approach to repair or replace the pump. Regular maintenance can help prevent many common issues. Knowing when to call a professional is essential for complex repairs.

  • If the sump pump won’t turn on, check the power source, float switch, and impeller for damage or blockages.
  • If the sump pump turns on but doesn’t eject water, check the impeller, check valve, and discharge pipe for damage or blockages.
  • If the sump pump runs continuously, check the float switch and adjust it if necessary. Ensure the pump is strong enough to handle the amount of water collecting in the drainage system.
  • If the sump pump turns on or off too soon or too late, adjust the float switch according to the manufacturer’s instructions.
  • If the sump pump is making strange noises, check the discharge pipe for blockages, secure the discharge pipe if necessary, and check the impeller and check valve for damage or blockages.

By following these safety precautions and troubleshooting tips, you can ensure your sump pump is working properly and prevent costly repairs and water damage. Regular routine maintenance is essential to extend the life of your sump pump and prevent common issues.

9. Schedule Annual Professional Maintenance

While regular DIY maintenance is essential, it’s also a good idea to have a professional plumber inspect and service your sump pump at least once a year. A professional can identify potential issues, such as worn-out components or electrical problems, and provide a more thorough inspection of your entire system.

  • What a Professional Will Do: During a professional maintenance check, the plumber will test the pump, inspect the power source, clean the sump pit, and ensure all components are functioning properly. They can also advise you on any necessary repairs or replacements.

10. Replace the Sump Pump When Necessary

Sump pumps have a limited lifespan, typically lasting around 7 to 10 years, depending on usage and maintenance. If your sump pump is older, it may be time to consider replacing it, even if it appears to be working fine. Not all sump pumps require lubricating their bearings; check the owner’s manual or search online for specific instructions based on your pump’s make and model.

  • Signs It’s Time for a Replacement: If your sump pump frequently fails to turn on, makes strange noises, or doesn’t seem to pump water efficiently, it may be nearing the end of its life. Replacing the pump before it fails can save you from unexpected flooding.

Conclusion

Maintaining your sump pump is essential to prevent flooding and protect your home from water damage. By regularly testing, cleaning, and inspecting your sump pump, you can ensure it operates efficiently when needed. Simple steps like clearing debris from the sump pit, checking the power source, and keeping the discharge pipe clear can make all the difference in keeping your basement or crawl space dry. If you need help maintaining or replacing your sump pump, contact the Pacific Plumbing Team for expert assistance. With proper care, your sump pump will provide reliable protection for your home for years to come

The Hidden Plumbing Issues in Older Homes

The Hidden Plumbing Issues in Older Homes: What to Watch Out For

Owning an older home has its charm, from unique architectural details to historical significance. However, with that charm often comes hidden plumbing problems in old homes that can lead to significant issues if left unaddressed. Many older homes were built with outdated plumbing materials and systems that may no longer meet modern standards, leading to inefficiency, potential damage, and costly repairs. If you live in or are considering purchasing an older home, here are some of the most common hidden plumbing issues to watch out for and how to address them.

1. Galvanized Steel Pipes

Many homes built before the 1960s used galvanized steel pipes in their water lines. While these pipes were durable at the time, they are prone to corrosion and rust over the years.

  • Why It’s a Problem: Galvanized steel pipes can corrode from the inside, leading to reduced water pressure, discolored water, and eventual leaks. The corrosion also narrows the inside of the pipe, restricting water flow and increasing the likelihood of clogs.
  • How to Fix It: The best solution is to replace galvanized steel pipes with modern materials like copper or PEX (cross-linked polyethylene). If you suspect your home has galvanized pipes, have a plumber inspect the system and recommend a replacement plan.

2. Lead Pipes or Lead Solder

Homes built before 1986 may have lead pipes or lead solder used in the plumbing system. Lead pipes were once common for water mains and other plumbing purposes, but we now know that lead can leach into drinking water, posing a serious health risk.

  • Why It’s a Problem: Lead exposure can lead to severe health problems, especially for children and pregnant women. Even small amounts of lead in drinking water can be harmful.
  • How to Fix It: If you live in an older home with lead pipes or lead solder, replacing them should be a top priority. Contact a professional plumber to assess the situation and replace the lead components with safe, modern materials.

3. Polybutylene Pipes

Between the 1970s and 1990s, polybutylene pipes were a popular choice for water supply lines in many homes due to their low cost. However, polybutylene pipes have been found to deteriorate and break down over time, especially when exposed to chlorine in the water supply.

  • Why It’s a Problem: Polybutylene pipes are prone to sudden and catastrophic failure, leading to severe water damage. These pipes can degrade from the inside out, often without any visible signs of trouble until a burst occurs.
  • How to Fix It: If your home has polybutylene pipes, it’s highly recommended to replace them with more reliable materials like copper or PEX. Don’t wait for a pipe to burst—proactive replacement can save you from costly repairs.

4. Deteriorating Sewer Lines

Older homes often have aging and failing sewer lines made from materials like clay, cast iron, or even Orangeburg (a bitumen-based material). Over time, these materials can deteriorate due to shifting soil, tree root intrusion, or general wear and tear.

  • Why It’s a Problem: Deteriorating sewer lines can lead to sewage backups, slow drains, and unpleasant odors in your home. Tree roots are particularly problematic, as they can penetrate sewer lines and cause blockages or leaks.
  • How to Fix It: A professional plumber can inspect your sewer line using video cameras to assess the condition of the pipes. If necessary, you may need to repair or replace the damaged sections of the sewer line. Regular maintenance and cleaning can also help prevent major issues.

5. Outdated or Inadequate Plumbing Ventilation

Plumbing systems in older homes may not have adequate ventilation, which is necessary for proper drainage and the prevention of sewer gases from entering the home. Modern plumbing codes require vent pipes that allow air to enter the system and help water drain smoothly.

  • Why It’s a Problem: Without proper ventilation, drains can become sluggish, and sewer gases can seep into the home, creating unpleasant odors and potential health hazards. Poor ventilation can also lead to increased pressure in the pipes, which may cause leaks or other damage.
  • How to Fix It: If your home has slow drains or you notice sewer smells, have a plumber inspect the ventilation system. They can install or upgrade vent pipes to ensure your plumbing system functions correctly.

6. Improper or Deteriorating Plumbing Repairs

Older homes often go through multiple rounds of repairs and renovations, and not all past plumbing work may have been done to code or with the proper materials. Poor-quality repairs can lead to leaks, clogs, or even serious damage over time.

  • Why It’s a Problem: Improper repairs or the use of temporary fixes can result in hidden issues that worsen over time. These repairs may not be immediately noticeable but can cause major problems if left unchecked.
  • How to Fix It: If you’ve recently purchased an older home or are experiencing plumbing issues, it’s a good idea to have a licensed plumber conduct a full inspection. They can identify any substandard repairs and recommend solutions to bring your plumbing up to current standards.

7. Pipe Bellies

Over time, the ground underneath a home can shift, causing sections of plumbing pipes to sag or develop “bellies.” These pipe bellies create low spots where water and waste can accumulate, leading to blockages and leaks.

  • Why It’s a Problem: Pipe bellies disrupt the natural flow of water and waste through your plumbing system. Over time, the pressure from accumulated water and waste can cause the pipes to crack or break, leading to leaks and water damage.
  • How to Fix It: A plumber can use video inspection tools to locate pipe bellies and determine the best course of action. In some cases, the pipes may need to be replaced or re-routed to ensure proper drainage.

8. Corroded or Rusty Pipe Joints

In older homes, pipe joints made of metal are prone to corrosion and rust. These joints can weaken over time, leading to leaks, low water pressure, and potential pipe failure.

  • Why It’s a Problem: Corroded pipe joints are vulnerable to leaks and can cause water damage to walls, floors, and ceilings. If the corrosion is severe, it may affect the integrity of the entire plumbing system.
  • How to Fix It: Replacing corroded pipes or joints is the best solution. A plumber can inspect the condition of the pipes and recommend whether spot repairs or a complete replacement is necessary.

9. Hidden Water Leaks

Water leaks can develop in hard-to-detect areas, such as behind walls, under floors, or in the basement. Older homes are particularly prone to hidden leaks due to aging pipes and fittings. Over time, even a small leak can cause significant water damage and mold growth.

  • Why It’s a Problem: Hidden leaks can lead to water damage, mold growth, and structural problems in your home. If left unchecked, a minor leak can turn into a major plumbing disaster.
  • How to Fix It: Regular inspections and leak detection tools can help you catch hidden leaks before they cause significant damage. If you suspect a leak, contact a plumber to locate and repair the issue.

10. Low Water Pressure

Older homes may suffer from low water pressure due to outdated plumbing systems, clogged pipes, corroded fixtures, or the demands of modern appliances. Low water pressure can make everyday tasks like showering and washing dishes difficult and may indicate more significant underlying problems.

  • Why It’s a Problem: Low water pressure can be a sign of corroded pipes, mineral buildup, or even leaks in the plumbing system. Ignoring the issue can lead to further damage and decreased plumbing efficiency.
  • How to Fix It: A plumber can assess the cause of low water pressure and recommend repairs or upgrades to restore normal flow. This may involve replacing old pipes, clearing clogs, or updating fixtures.

11. Outdated Fixtures and Connections

Outdated fixtures and connections can cause a range of plumbing problems in older homes. These fixtures and connections are often prone to corrosion, leaks, and restricted water flow, leading to costly plumbing repairs. Modern fixtures, especially those with features like touchless sensors, can significantly improve both functionality and aesthetics, while also reducing the risk of plumbing issues.

Some common signs of outdated fixtures and connections include:

  • Leaks or water damage around sinks, toilets, and showers
  • Restricted water flow or low water pressure
  • Corrosion or rust on pipes and fittings
  • Broken or worn-out handles or knobs on faucets and toilets

Replacing outdated fixtures and connections with modern, low-flow alternatives can help reduce water waste and lower utility bills. It’s essential to hire a professional plumber to inspect and replace outdated fixtures and connections to ensure the plumbing system is functioning properly.

12. Signs of Plumbing Problems

Plumbing problems can often be hidden and require a professional inspection to detect. However, there are some common signs that homeowners can look out for to identify potential issues early on:

  • Discolored water or unusual odors from sinks, toilets, or showers
  • Slow draining or clogging of sinks, toilets, or showers
  • Leaks or water damage around pipes, fixtures, or appliances
  • Unusual noises or vibrations from pipes or appliances
  • Increased water bills or unexpected changes in water pressure

If you notice any of these signs, it’s essential to hire a professional plumber to inspect and diagnose the problem. Early detection and repair can help prevent costly plumbing repairs and ensure the plumbing system is functioning properly.

13. Importance of Regular Inspections

Regular inspections are crucial to maintaining the health and functionality of a plumbing system. A professional plumbing inspection can help detect hidden plumbing problems, identify potential issues, and prevent costly repairs.

Some benefits of regular inspections include:

  • Early detection and repair of plumbing problems
  • Prevention of costly plumbing repairs and water damage
  • Improved water efficiency and reduced utility bills
  • Extended lifespan of plumbing fixtures and appliances
  • Peace of mind and reduced stress

It’s recommended to schedule a professional plumbing inspection every 1-2 years, or as needed. A professional plumber can inspect the plumbing system, identify potential issues, and provide recommendations for maintenance and repair.

Conclusion

While older homes offer plenty of character and charm, they often come with hidden plumbing issues that can lead to significant problems if not addressed. From outdated materials like galvanized and lead pipes to hidden leaks and deteriorating sewer lines, these issues require careful attention and proactive solutions. Regular inspections and maintenance are key to keeping your home’s plumbing system in good condition. If you suspect any of these hidden issues in your home, contact the Pacific Plumbing Team for expert advice and repairs to protect your home from costly plumbing disasters.

Common Causes of Low Water Pressure and How to Fix Them

Common Causes of Low Water Pressure and How to Fix Them

Low water pressure is a frustrating issue that can disrupt daily activities like showering, washing dishes, and even running appliances like washing machines. While the occasional drop in water pressure might not seem like a big deal, persistent low pressure can signal deeper plumbing issues that need attention. Understanding the common causes of low water pressure and how to fix them is essential to maintaining a smoothly operating plumbing system. In this post, we’ll explore the most frequent causes of low water pressure and offer practical solutions to help you restore strong water flow in your home.

What is Water Pressure and How is it Measured?

Water pressure refers to the force exerted by water as it flows through your plumbing system. It is typically measured in pounds per square inch (PSI) and plays a crucial role in determining the performance of your plumbing fixtures and appliances. In most residential settings, water pressure ranges between 40 and 80 PSI, with the ideal range being 45 to 55 PSI. Maintaining proper water pressure is essential for ensuring that your plumbing system operates efficiently and that you avoid issues related to low water pressure in your home.

Common Causes of Low Water Pressure

1. Clogged or Dirty Faucets and Showerheads

One of the simplest and most common causes of low water pressure is a clogged faucet or showerhead. Over time, mineral deposits (especially in homes with hard water) or debris can accumulate in the small openings of faucets and showerheads, restricting water flow.

  • How to Fix It: Remove the faucet aerator or showerhead and soak it in a vinegar solution for a few hours to dissolve the mineral buildup. You can also scrub it with a brush to remove any debris. Reinstall the cleaned fixture, and you should notice an improvement in water pressure.

2. Partially Closed or Malfunctioning Shut-Off Valves

The main water shut-off valve controls the flow of water into your home. If this valve is not fully open, it can restrict water flow and cause low pressure throughout the house. Additionally, individual shut-off valves near sinks, toilets, or washing machines can cause low water pressure if they’re not fully open.

  • How to Fix It: Check the main shut-off valve, usually located near your water meter or where the main water line enters your home. Ensure the valve is fully open. You should also check the individual shut-off valves near any fixtures experiencing low pressure. Open these valves completely to restore water flow.

3. Clogged Pipes

Clogged water pipes in your home’s plumbing system can also lead to low water pressure. Over time, mineral deposits, rust, and debris can accumulate inside the pipes, restricting the flow of water. This problem is common in older homes with galvanized steel pipes, which are prone to rust and corrosion.

  • How to Fix It: If you suspect a clogged pipe, it’s best to call a professional plumber to inspect and, if necessary, clean or replace the affected pipes. In cases of severe corrosion or mineral buildup, pipe replacement may be necessary.

4. Leaks in the Plumbing System

A hidden leak in your plumbing system, often referred to as leaking pipes, can reduce water pressure by diverting water away from your fixtures. Leaks can occur in pipes hidden behind walls, under floors, or underground, making them difficult to detect without professional help.

  • How to Fix It: If you notice low water pressure in combination with damp spots, mold growth, or an unexplained increase in your water bill, you may have a leak. Contact a plumber to inspect your plumbing system and repair any leaks. In some cases, specialized tools like leak detection equipment may be needed to locate the source of the problem.

5. Problems with the Pressure Regulator

A broken pressure regulator is a device that controls the water pressure entering your home. If the regulator is malfunctioning or improperly adjusted, it can cause either high or low water pressure throughout your home.

  • How to Fix It: Check your pressure regulator (if your home has one) and ensure it’s functioning properly. You can use a pressure gauge to measure the water pressure at your outdoor spigot. If the pressure is significantly lower than normal (typically between 40 and 60 PSI), the regulator may need to be replaced. This is a job best left to a professional plumber.

6. Corroded Pipes

In older homes, galvanized steel or iron pipes can become corroded over time, leading to low water pressure. The corrosion narrows the diameter of the pipe, restricting water flow. If you live in an older home and have noticed a gradual decline in water pressure, corroded pipes may be to blame.

  • How to Fix It: Replacing old, corroded pipes with newer materials such as copper or PEX (cross-linked polyethylene) is the most effective solution. This will not only restore water pressure but also prevent future issues related to pipe corrosion.

7. Municipal Water Supply Issues

Sometimes, the cause of low water pressure isn’t inside your home at all—it may be related to the municipal water supply. Maintenance work, a break in the main water line, or high demand in your neighborhood can reduce water pressure temporarily.

  • How to Fix It: Contact your local water utility to check if there is any maintenance or issue affecting your area’s water pressure. If the problem is temporary, the pressure should return to normal once the issue is resolved.

8. Shared Plumbing Lines

If your home shares a water line with other homes or units, you may experience low water pressure when your neighbors are using a lot of water at the same time. This is common in apartment buildings or older neighborhoods with shared water systems.

  • How to Fix It: If you live in a shared water system, the only permanent solution may be to install a separate water line. However, if this isn’t feasible, you can work around the issue by using water during off-peak times, such as early in the morning or late at night when demand is lower.

9. Sediment Buildup in Water Heaters

If you notice low water pressure only when using hot water, the problem could be related to sediment buildup in your water heater. Over time, minerals from hard water can accumulate at the bottom of the water heater tank, restricting water flow.

  • How to Fix It: Flushing the water heater tank to remove sediment buildup is the best way to resolve this issue. You can perform this task yourself by following the manufacturer’s instructions, or you can hire a professional plumber to flush the tank for you.

10. Plumbing Fixtures and Appliances

Plumbing fixtures and appliances, such as faucets, toilets, and water heaters, rely on proper water pressure to function efficiently. When water pressure is too low, these fixtures and appliances may perform poorly, consume more energy, and have a reduced lifespan. Regular maintenance and inspection of your plumbing fixtures and appliances can help identify potential issues related to water pressure, ensuring that they continue to operate effectively and efficiently.

Diagnosing Low Water Pressure

Diagnosing low water pressure involves identifying the source of the problem within your plumbing system. Start by checking the water meter valve, which controls the flow of water from the municipal water supply into your home. Ensure that this valve is fully open. Next, inspect the pressure regulator, if your home has one, to make sure it is functioning correctly. Additionally, examine your plumbing fixtures for any signs of blockage, corrosion, or damage. It is also essential to inspect the entire plumbing system, including branch lines and the main water supply line, to determine the root cause of the issue. If you are unable to identify the source of the problem, a professional plumber can help diagnose and resolve low water pressure issues in your home.

How to Fix Low Water Pressure Issues

Depending on the cause of low water pressure in your home, there are various solutions to restore proper water pressure and normal water flow. Here are some general steps you can take to fix low water pressure:

1. Clean or Replace Fixtures

  • Remove any blockages in faucets and showerheads by cleaning them with a vinegar solution or replacing them if necessary.

2. Check and Open Valves

  • Ensure all shut-off valves are fully open, including the main shut-off valve and individual fixture valves.

3. Fix Leaks

  • If you suspect a leak, locate the source and repair it as soon as possible. Contact a plumber for assistance if the leak is hidden or difficult to detect.

4. Replace or Repair Pressure Regulators

  • If your pressure regulator is malfunctioning, have it inspected and replaced by a professional.

5. Upgrade Old Pipes

  • Consider upgrading your home’s plumbing system if old, corroded pipes are causing low water pressure. Newer materials like copper or PEX can improve water flow and prevent future problems.

6. Flush Your Water Heater

  • Flushing your water heater annually can help prevent sediment buildup and improve water flow for hot water.

Conclusion

Low water pressure can be caused by various factors, ranging from simple clogs in fixtures to more serious plumbing issues like leaks, corrosion, or municipal water supply problems. The key to fixing low water pressure is identifying the underlying cause and taking the appropriate action. If you’re unsure about the cause of your home’s low water pressure or if DIY solutions haven’t resolved the issue, contact the Pacific Plumbing Team for a professional inspection and expert repairs.

The Latest Smart Plumbing Technology for Modern Homes

The Latest Smart Plumbing Technology for Modern Homes

As technology continues to advance, smart home systems are becoming more common, and plumbing is no exception. These advancements not only enhance convenience and efficiency but also significantly reduce the environmental impact of water usage in modern homes. Modern homeowners are increasingly looking for ways to integrate technology into their homes to enhance convenience, improve efficiency, and reduce water waste. Smart plumbing systems offer innovative solutions that help you monitor and manage your home’s water usage, detect leaks early, and even automate tasks like water heating.

Plumbing Technology Advancements

Plumbing technology has come a long way in recent years, with advancements in materials, design, and functionality. One of the most significant developments is the integration of smart technology into plumbing systems. Smart plumbing systems use sensors, IoT devices, and sophisticated software to monitor and control water usage, flow, and temperature in real-time. This technology enables homeowners and businesses to optimize their water usage, reduce waste, and save on utility bills. Additionally, smart plumbing systems can detect leaks and alert users to potential issues, reducing the risk of water damage and costly repairs.

Let’s explore the latest smart plumbing technology for modern homes and how it can make your life easier.

1. Smart Water Leak Detectors

Water leaks can cause significant damage to your home if they go unnoticed for too long. Smart water leak detectors are one of the most popular innovations in plumbing technology, helping homeowners detect leaks early before they turn into costly disasters.

  • How They Work: Smart water leak detectors are small sensors placed near areas prone to leaks, such as under sinks, near washing machines, or around water heaters. These devices monitor for excess moisture or changes in water flow and send instant alerts to your smartphone when a leak is detected.
  • Benefits: Early detection of leaks can prevent water damage, mold growth, and expensive repairs. Some systems even shut off the water supply automatically when a leak is detected, providing an added layer of protection, which is a significant advantage for any plumbing business.
  • Popular Options: Devices like the Flo by Moen, Honeywell Lyric, and Phyn Plus are examples of smart water leak detectors that offer real-time monitoring and notifications via mobile apps.

2. Smart Water Shut-Off Valves

Building on the functionality of leak detectors, smart water shut-off valves take leak prevention to the next level by integrating seamlessly into your plumbing system. These devices can automatically stop water flow to your home in the event of a leak, protecting your property from water damage.

  • How They Work: Smart shut-off valves are installed on your main water line and work in conjunction with smart leak detectors or independently. When a leak is detected, the system shuts off the water supply to prevent further leakage. You can also control the valve remotely through a smartphone app.
  • Benefits: By preventing significant water loss and damage, smart shut-off valves can save homeowners thousands of dollars in repairs. These devices also give you peace of mind, especially if you’re away from home for an extended period.
  • Popular Options: The Flo by Moen Smart Water Shutoff and Phyn Smart Water Assistant are popular choices that provide real-time water monitoring, remote control, and automatic shut-off in emergencies.

3. Smart Water Heaters

Traditional water heaters can be inefficient and consume more energy than necessary. Smart water heaters offer a high-tech solution by allowing you to control your water heating system remotely and improve energy efficiency.

  • How They Work: Smart water heaters are equipped with Wi-Fi connectivity and sensors that allow you to monitor and control your hot water usage from your smartphone. You can adjust the temperature, set heating schedules, and receive alerts if there’s a problem with the system, such as a leak or malfunction.
  • Benefits: With smart controls, you can optimize your water heater’s performance to save on energy costs. By scheduling hot water use around your needs, you avoid heating water when it’s not necessary, which reduces waste. You’ll also receive maintenance reminders and can track your energy consumption. By adopting smart water heaters, homeowners contribute to a sustainable and efficient future by optimizing energy use and reducing waste.
  • Popular Options: Some of the most advanced smart water heaters include the Rheem EcoNet, Rinnai Sensei SE+ Tankless Water Heater, and the A. O. Smith Signature Series, all of which offer remote control, energy usage tracking, and leak detection features.

4. Smart Showers

Imagine starting your day with the perfect shower temperature every morning, thanks to smart technology. Smart showers allow you to control your shower’s water temperature, flow rate, and duration from your smartphone or through voice commands with virtual assistants like Alexa or Google Assistant.

  • How They Work: Smart showers are equipped with digital controls and Wi-Fi connectivity, allowing you to preset your ideal water temperature, customize shower modes, and even monitor your water usage. You can start your shower remotely or adjust the settings while you’re in the shower for the perfect experience every time. Unlike traditional plumbing systems, smart showers offer real-time control and customization, enhancing both convenience and water conservation.
  • Benefits: Smart showers help conserve water by allowing you to monitor usage and set limits. They also offer personalized experiences, where each family member can save their preferred shower settings, from temperature to flow rate.
  • Popular Options: Kohler Konnect, U by Moen Smart Shower, and Delta VoiceIQ are popular smart shower systems that combine luxury with water-saving features, offering complete control over your shower experience.

5. Smart Irrigation Systems

Watering your lawn or garden is important, but traditional irrigation systems can waste water by running too long or activating during rain. Smart irrigation systems help you manage your outdoor water usage more efficiently by optimizing when and how much water your plants need.

  • How They Work: Smart irrigation systems are connected to local weather forecasts and soil moisture sensors to determine the optimal watering schedule. The system adjusts watering times based on real-time weather data, preventing overwatering or watering during rain.
  • Benefits: With smart irrigation, you can save significant amounts of water while ensuring that your plants get exactly what they need. These systems also reduce your water bill and help create a more sustainable home by preventing water waste. These smart irrigation systems are an essential part of modern plumbing services, ensuring efficient water use and sustainability.
  • Popular Options: The Rachio Smart Sprinkler Controller and RainMachine Smart Wi-Fi Irrigation Controller are widely used smart irrigation systems that provide real-time data, remote control, and weather-based watering adjustments.

6. Touchless Faucets

Touchless faucets are no longer just for commercial restrooms—they’ve made their way into modern homes, bringing convenience and improved hygiene to kitchens and bathrooms.

  • How They Work: These faucets are equipped with motion sensors that activate water flow when you place your hands or an object under the spout. You can control the water flow and temperature without touching the faucet, which is particularly useful in kitchens when your hands are dirty or full.
  • Benefits: Touchless faucets reduce the spread of germs and bacteria, making them a more hygienic option for your home. They also help conserve water by automatically turning off when you move away from the sensor. Touchless faucets are becoming a standard feature in modern plumbing services, offering both convenience and improved hygiene.
  • Popular Options: Moen and Kohler are leading manufacturers of touchless faucets, offering models that can also be controlled via voice commands or smartphone apps for an even more seamless experience.

7. Smart Water Monitoring Systems

Smart water monitoring systems give you detailed insights into your home’s water usage. These devices track water consumption in real time, helping you identify inefficiencies and potential leaks.

  • How They Work: Smart water monitors are installed on your main water line and provide data on how much water each fixture and appliance in your home uses. You can access this information via an app to see where you can reduce water usage or detect unusual patterns that may indicate a leak.
  • Benefits: By keeping track of your water usage, you can find opportunities to conserve water and lower your utility bills. These systems also alert you to potential problems, such as leaks or overuse, before they turn into bigger issues.
  • Popular Options: Products like the Flume Smart Water Monitor and Phyn Smart Water Assistant allow homeowners to track water usage, detect leaks, and receive real-time alerts about water consumption.

8. Water Management and Conservation

Water management and conservation are critical components of sustainable and efficient plumbing systems. Greywater recycling systems, for example, can collect and treat wastewater from sinks, showers, and washing machines, allowing it to be reused for irrigation, toilet flushing, and other non-potable purposes. Rainwater harvesting systems can also collect and store rainwater for use in laundry, toilet flushing, and irrigation, reducing the demand on freshwater sources. Furthermore, low-flow fixtures and appliances can significantly reduce water consumption, making them an essential part of any water conservation strategy.

9. Efficient Plumbing Fixtures

Efficient plumbing fixtures are designed to reduce water consumption while maintaining performance. Low-flow showerheads, faucets, and toilets use advanced technologies such as aerators and sensors to minimize water usage. For instance, low-flow showerheads can reduce water consumption by up to 30% while still providing a satisfying shower experience. Similarly, low-flow toilets use advanced flushing mechanisms to reduce water usage while maintaining effective waste removal. By installing efficient plumbing fixtures, homeowners and businesses can significantly reduce their water consumption and lower their utility bills.

10. Plumbing Industry Trends

The plumbing industry is constantly evolving, with new trends and technologies emerging every year. One of the most significant trends is the increasing adoption of smart plumbing systems, which offer enhanced control, efficiency, and insight into water usage and management. Another trend is the growing demand for sustainable and eco-friendly plumbing solutions, such as greywater recycling systems and rainwater harvesting systems. Additionally, the use of advanced materials and technologies, such as PEX pipes and 3D printing, is becoming more widespread in the plumbing industry.

11. Innovations in Plumbing Systems

Innovations in plumbing systems are transforming the way we manage water usage and waste. One of the most significant innovations is the development of self-cleaning plumbing fixtures, which use advanced technologies such as UV light disinfection and antimicrobial coatings to eliminate germs and bacteria. Another innovation is the use of advanced sensors and algorithms to detect leaks and predict maintenance needs, reducing the risk of water damage and costly repairs. Furthermore, the integration of plumbing systems with smart home ecosystems is becoming more common, enabling homeowners to control and monitor their plumbing systems remotely.

Conclusion

The latest smart plumbing technology offers modern homeowners a wealth of benefits, from preventing leaks to improving water efficiency and convenience. By integrating smart water systems, you can save money on utility bills, protect your home from water damage, and enjoy greater control over your water usage. Whether it’s smart leak detectors, automated shut-off valves, or personalized shower systems, these innovations are transforming the way we manage plumbing in our homes.

If you’re ready to upgrade your plumbing with smart technology, contact the Pacific Plumbing Team for expert advice and installation services. We can help you choose the best systems to meet your needs and ensure your home’s plumbing is as efficient and modern as possible.

Benefits of Water Softener

Benefits of Water Softener: Why You Should Have One in Your Home

Hard water is a common issue in many households, characterized by a high concentration of minerals like calcium and magnesium. While not dangerous to your health, hard water can cause a range of problems, from reducing the efficiency of appliances to leaving your skin and hair feeling dry. Fortunately, a water softener is a reliable solution that can prevent these issues by removing excess minerals from your water supply.

What is a Water Softener?

A water softener is a device designed to remove the minerals that cause hard water, transforming it into soft water that is more suitable for household use. Hard water contains high levels of minerals like calcium and magnesium, which can lead to a variety of issues in your home. Water softeners work through a process known as ion exchange, where sodium or potassium ions are swapped for the calcium and magnesium ions in the water. This exchange effectively removes the hard minerals, resulting in soft water that is gentler on your plumbing, appliances, skin, and hair. Installing a water softener in your home ensures that you have a consistent supply of soft water, which can significantly improve your quality of life.

How Does a Water Softener Work?

A water softener uses a process called ion exchange to remove the minerals responsible for hard water. It contains resin beads that are negatively charged and attract the positively charged calcium and magnesium ions in hard water. These ions are swapped out for sodium ions, which don’t cause the same issues. As water flows through the softener, the hard minerals are removed, and softened water is distributed throughout your home.

Key Benefits of Water Softener in Your Home

1. Prolongs the Life of Plumbing and Appliances by Reducing Mineral Deposits

One of the biggest advantages of installing a water softener system is the protection it provides to your plumbing system and water-using appliances.

  • Prevents Scale Buildup: Hard water causes scale, a buildup of minerals that can clog pipes, reduce water flow, and damage appliances like dishwashers, washing machines, and water heaters. Over time, scale can significantly decrease the efficiency of your appliances and lead to costly repairs or replacements. A water softener system eliminates these minerals, preventing scale buildup and ensuring your plumbing system runs smoothly.
  • Increases Appliance Lifespan: Appliances that use water, such as water heaters, last longer when they operate with soft water. Scale buildup inside a water heater can force it to work harder to heat water, reducing its lifespan. With a water softener system, you can increase the lifespan of your appliances and reduce the frequency of repairs.

2. Improved Efficiency of Water Heaters

Water heaters are particularly affected by hard water due to the mineral deposits that accumulate at the bottom of the tank.

  • Enhances Heating Efficiency: When hard water leaves behind mineral deposits, the water heater has to work harder to heat the water, using more energy and driving up utility bills. A water softener prevents this sediment buildup, improving the heater’s efficiency and reducing energy consumption.
  • Reduces Energy Bills: By improving your water heater’s efficiency, a water softener can help lower your gas or electric bill. According to research, water heaters using soft water are up to 30% more efficient than those using hard water.

3. Softer Skin and Healthier Hair

Hard water can leave a residue on your skin and hair, leading to dryness and irritation.

  • Healthier Skin: When you bathe in hard water, soap doesn’t lather as well and is difficult to rinse off, leaving behind a soapy film that can clog pores and irritate skin. Soft water, on the other hand, rinses cleanly, preserving your natural oils and leaving your skin softer and less prone to dryness or irritation.
  • Shinier Hair: Just as hard water can dry out your skin, it can also make your hair feel dull and dry. Soft water allows shampoo to lather more easily and rinse more thoroughly, leaving your hair shinier, softer, and more manageable.

4. Brighter, Softer Laundry

Washing clothes in hard water can cause them to wear out faster due to the mineral residue left behind.

  • Prevents Stiff, Faded Clothes: Using systems that soften water prevents detergent from leaving soap scum trapped in fabric fibers, making clothes feel stiff and look faded. Soft water allows detergent to work more effectively, keeping your clothes looking brighter, feeling softer, and lasting longer.
  • Reduces Detergent Use: Since soft water helps detergent dissolve more easily, you’ll need less of it to get your clothes clean. This not only saves you money on laundry products but also helps extend the life of your clothes.

5. Spot-Free Dishes and Cleaner Bathrooms

If you’ve ever noticed spots or streaks on your dishes or glassware after washing, hard water is likely the culprit. The minerals in hard water leave behind residue as water evaporates.

  • Spot-Free Dishes: A water softener eliminates the minerals that cause these unsightly spots, leaving your dishes and glassware sparkling clean after each wash. Additionally, softened water improves the quality of drinking water by reducing mineral levels that can cause unpleasant tastes.
  • Cleaner Bathrooms: Hard water also contributes to soap scum buildup in your sinks, tubs, and showers, making cleaning a constant chore. With a water softener, you’ll notice fewer water stains and less soap scum, making your bathroom easier to clean and maintain.

6. Reduces the Amount of Soap and Detergent Used

Hard water doesn’t interact well with soap, reducing its lathering ability and forcing you to use more soap and detergent for the same cleaning power.

  • Improved Cleaning Efficiency: Soft water enhances the lathering ability of soaps and detergents, allowing you to use less product to achieve the same results. This applies to everything from dishwashing liquid to laundry detergent, shampoo, and body wash.
  • Saves Money on Cleaning Products: Since you’ll need to use less soap and detergent with soft water, you’ll save money over time on cleaning products and personal care items.

7. Better for the Environment

A water softener not only benefits your household but also has positive environmental impacts.

  • Conserves Energy: Since soft water improves the efficiency of water heaters and other appliances, less energy is consumed to heat water and operate appliances. This reduced energy consumption can lower your home’s carbon footprint.
  • Decreases Chemical Use: With soft water, you’ll need fewer cleaning products, detergents, and soaps. Reducing the amount of chemicals released into the environment helps make your home more eco-friendly.

8. Health Benefits

Soft water offers several health benefits that can make a noticeable difference in your daily life. One of the primary advantages is the improvement in skin and hair health. Hard water often leaves behind mineral deposits that can cause dryness and itchiness, exacerbating conditions like eczema and acne. By removing these minerals, soft water helps to keep your skin hydrated and less prone to irritation. Additionally, soft water reduces soap scum buildup, allowing soaps and shampoos to work more effectively. This not only makes bathing and showering more pleasant but also helps to balance the pH level of your hair, making it healthier, shinier, and more manageable.

Choosing the Right Water Softeners

Selecting the right water softener for your home depends on several factors, including the size of your household, your water usage, and the hardness level of your water. There are two main types of water softeners to consider: salt-based and salt-free. Salt-based water softeners are the most common and effective, using salt to remove heavy minerals from the water. However, they require regular maintenance and can be larger in size. On the other hand, salt-free water softeners do not use salt and are typically smaller, but they may not be as effective in removing mineral deposits. When choosing a water softener, it’s important to assess your specific needs and preferences to find the best fit for your home.

Maintenance and Care

Regular maintenance and care are crucial to ensure your water softener operates efficiently and lasts for years. It’s recommended to check the salt levels in your water softener every 4-6 weeks and to use the appropriate type of salt for your system. Additionally, cleaning the water softener periodically can help remove iron and other heavy metals from the resin beads, allowing them to regenerate properly with salt. It’s also advisable to run the softener drain separately in a small drain field or off-premise to prevent potential issues with your septic system. By following these maintenance tips, you can keep your water softener in top condition and enjoy the benefits of soft water without interruption.

Cost and Installation

The cost of a water softener can vary widely, typically ranging from $500 to $2500, depending on the type and quality of the system, as well as installation costs. Installing a water softener usually requires the expertise of a professional plumber and can take several hours to complete. While the initial investment may seem significant, the long-term savings on household expenses can offset the cost. With a water softener, you’ll use less soap and detergent, extend the lifespan of your plumbing fixtures and appliances, and reduce energy costs by improving the efficiency of your water heater and other appliances. Overall, investing in a water softener is a smart decision that can enhance your home’s efficiency and save you money in the long run.

Conclusion

Investing in a water softener is a smart decision for any homeowner dealing with hard water. From extending the lifespan of your plumbing and appliances to improving the quality of your skin, hair, and laundry, the benefits of soft water are wide-reaching. Not only will you save money on maintenance, energy bills, and cleaning products, but you’ll also enjoy the peace of mind that comes with a more efficient home.

If you’re experiencing the negative effects of hard water, contact the Pacific Plumbing Team today to learn more about how a water softener can improve your water quality and protect your home’s plumbing system.